Ask a child whether the Romans came before or after the Vikings, or whether the Tudors lived at the same time as the Aztecs, and you might get a puzzled look. That's completely normal. History is often taught one topic at a time, so it's easy for children to end up with lots of fascinating stories but no clear sense of how they fit together.
That's where a history timeline comes in. A timeline turns the past into something children can see, touch and add to. It helps them understand that history is one long story, and that the people they read about lived in a particular order.
In this guide, we'll walk you through how to make a history timeline for kids at home, whether you're homeschooling full time or simply supporting what your child learns at school.
Why Timelines Work So Well for Children
Dates on their own can feel abstract. "1066" or "2500 BC" doesn't mean much to a seven-year-old until they can see where it sits compared with everything else. A timeline helps children to:
- ✦
Understand chronology, the order in which events happened
- ✦
Grasp just how long ago some periods were (the pyramids were already ancient when the Romans arrived in Egypt!)
- ✦
Spot civilisations that existed at the same time in different parts of the world
- ✦
Make connections between topics they've studied months apart
- ✦
Remember what they've learned, because they've physically added it themselves
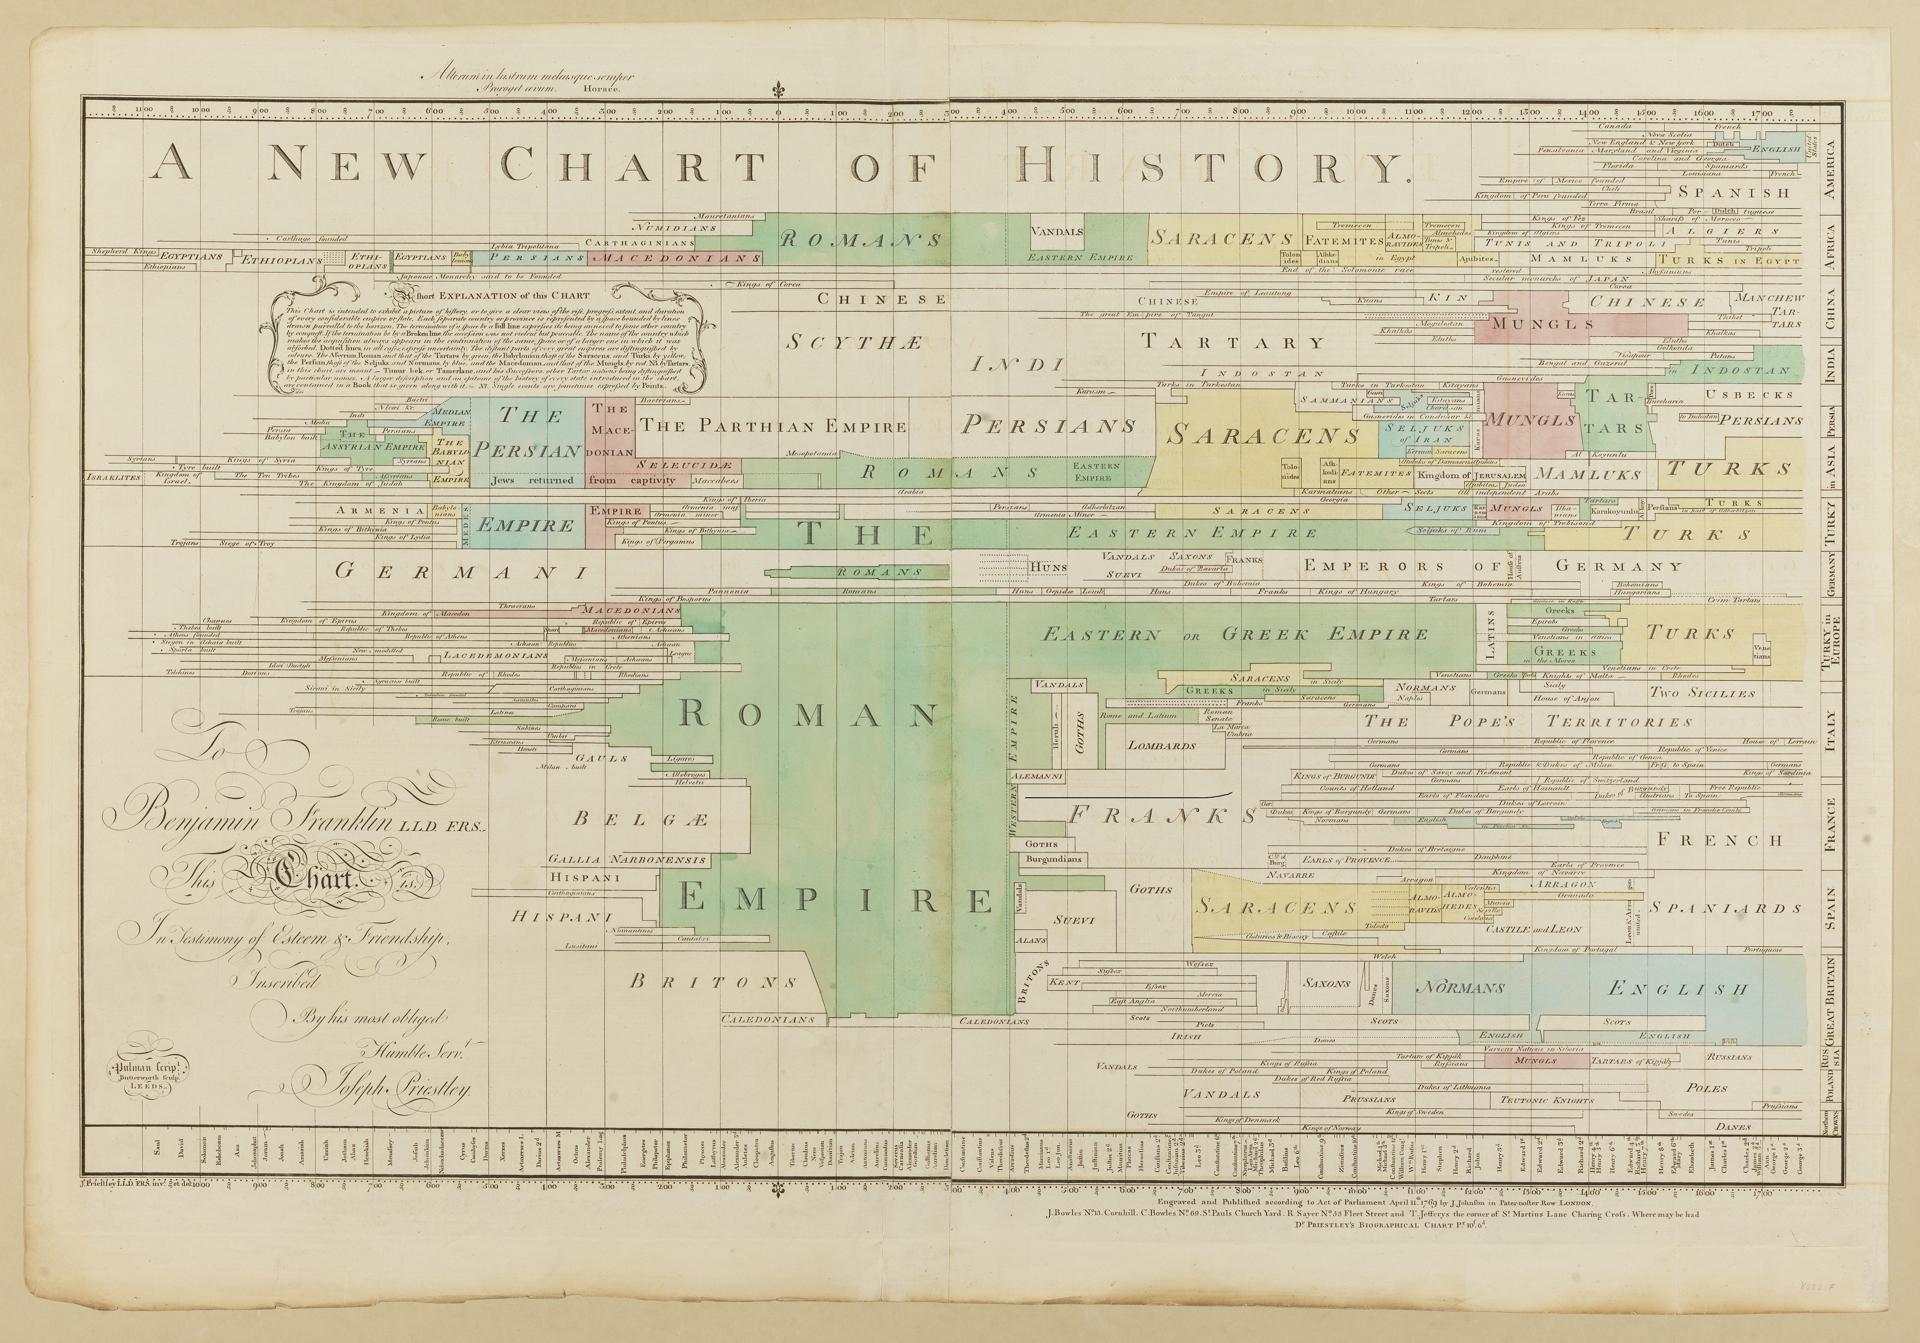
Timelines aren't a new idea, either. In the 1760s, the English scientist and teacher Joseph Priestley published two famous charts, A Chart of Biography (1765) and A New Chart of History (1769), to help his students see the whole sweep of history at a glance. More than 250 years later, the idea still works brilliantly.
Choosing the Right Type of Timeline
There's no single right way to make a history timeline. The best one is the one that suits your space, your child's age and how you like to learn. Here are the most popular options.
1. A Wall Timeline
A wall timeline runs along a hallway, staircase or bedroom wall. Because it's always on display, children see it every day, which is fantastic for reinforcing learning. You can make one from pieces of paper taped together, or use a long roll of paper, whatever works in your space!
2. A Timeline Notebook or "Book of Centuries"
If wall space is tight, a timeline notebook is a lovely alternative. One well-known approach is the "Book of Centuries", an idea popularised by the British educator Charlotte Mason. Each page or double page represents a century and children add drawings, dates and notes as they learn. Over the years it becomes a treasured record of everything they've studied.
3. A Washing Line Timeline
Hang a piece of string across a room and peg picture cards along it. This is perfect for younger children because cards can be moved around easily. It also makes a great sorting game: give your child a handful of cards and ask them to put them in order.
4. A Folding or Accordion Timeline
Fold a long strip of card into a zigzag so it can be stretched out on the floor and packed away afterwards. These work well for focusing on a single period, such as the Tudors or the Second World War.
How to Make a History Timeline: Step by Step
- ✦
Decide on your time span. Will your timeline cover all of human history, or just one period? A whole-history timeline is great for the long term, while a period timeline is ideal for a single topic.
- ✦
Choose a scale. This is the trickiest part, so keep it simple. For example, on a wall timeline you might give each century the same amount of space. Be aware that the distant past takes up a lot of room, so many families compress the earliest periods and leave more space for the last 2,000 years.
- ✦
Mark the key divisions. Add clear labels for centuries or millennia. Use a bold line to mark the change from BC to AD (also written BCE and CE).
- ✦
Add a few "anchor" events. Start with a handful of well-known moments so children have reference points. See our suggestions below.
- ✦
Add new cards as you learn. Every time you finish a book, topic, project or lesson, add a picture or fact to the timeline. This is the part children love most.
- ✦
Revisit it often. Take a minute each week to look back along the timeline together and talk about what's changed.
Anchor Events to Get You Started
Here are some well-known events that make useful starting points. Dates for the ancient world are approximate.
Event | Approximate date |
|---|---|
The Great Pyramid of Giza is built | c. 2560 BC |
The first recorded ancient Olympic Games in Greece (traditional date) | 776 BC |
The Romans invade Britain | AD 43 |
Vikings raid the monastery at Lindisfarne | AD 793 |
The Battle of Hastings | 1066 |
Christopher Columbus reaches the Americas | 1492 |
The Great Fire of London | 1666 |
Queen Victoria comes to the throne | 1837 |
The Second World War ends | 1945 |
Humans first walk on the Moon | 1969 |
Explaining BC and AD to Children
One of the most confusing things about timelines is that BC dates count backwards. A child might reasonably think 2000 BC is more recent than 500 BC, because 2000 is a bigger number!
A simple way to explain it is to imagine a number line. AD (or CE) years count forwards from year 1, like positive numbers. BC (or BCE) years count backwards, like negative numbers. So the further a BC date is from zero, the longer ago it was. Showing this on your timeline makes it click for most children far quicker than any explanation.
It's also worth knowing that there is no year zero: 1 BC is followed directly by AD 1.
Tips to Make Your Timeline Fun
- ✦
Let children draw their own pictures. Their own artwork is far more memorable than printed images.
- ✦
Colour-code by place. For example, use one colour for Britain, another for the Americas and another for Asia, so children can see what was happening around the world at the same time.
- ✦
Add family history. Mark when grandparents were born or when your family moved house. It helps children see that they are part of history too.
- ✦
Include favourite characters. If your child has loved a story set in a particular period, add the book or a character to the timeline.
- ✦
Play timeline games. Hide a card and ask which event is missing, or ask "What came first?" questions.
How Often Should You Add to It?
Little and often works best. You don't need to sit down for a long timeline session. Simply adding one card after each history lesson, or at the end of each topic, will build a rich picture of the past over a school year. For younger children, five minutes is plenty.
Bring Your Timeline to Life with Mysteries in Time
A timeline gives children the big picture, but it's the stories that make history stick. At Mysteries in Time, each of our titles pairs an exciting storybook with a colourful history fact magazine, so children can enjoy an adventure set in a real historical period and then explore the facts behind it.
It's a perfect match for a family timeline: finish a Mysteries in Time adventure, then let your child add the period, their favourite facts and a drawing of the characters to the wall. Over time, your timeline becomes a map of everything they've discovered.
Explore our full range of history adventures at Mysteries in Time.